How To Repair/Fix Beyblade Launcher Skipping Issues
We have all been there. You bought a shinny new string or ripcord launcher. After using it for many battle you start to notice something doesn’t feel right. Launcher isn’t nearly as fast as it used to be. (Even when compared to other launchers of same kind you just unboxed) and it makes a weird sound. This is called Skipping. Let’s understand what cause it and how to fix it.
Note: This guide follows MFB String Launcher for reference. But this method should work on all kinds of launchers, regardless of generation. But if you’re looking for guide specifically for Burst launcher. Check out video by Blader ZX
What cause it and how to avoid it?
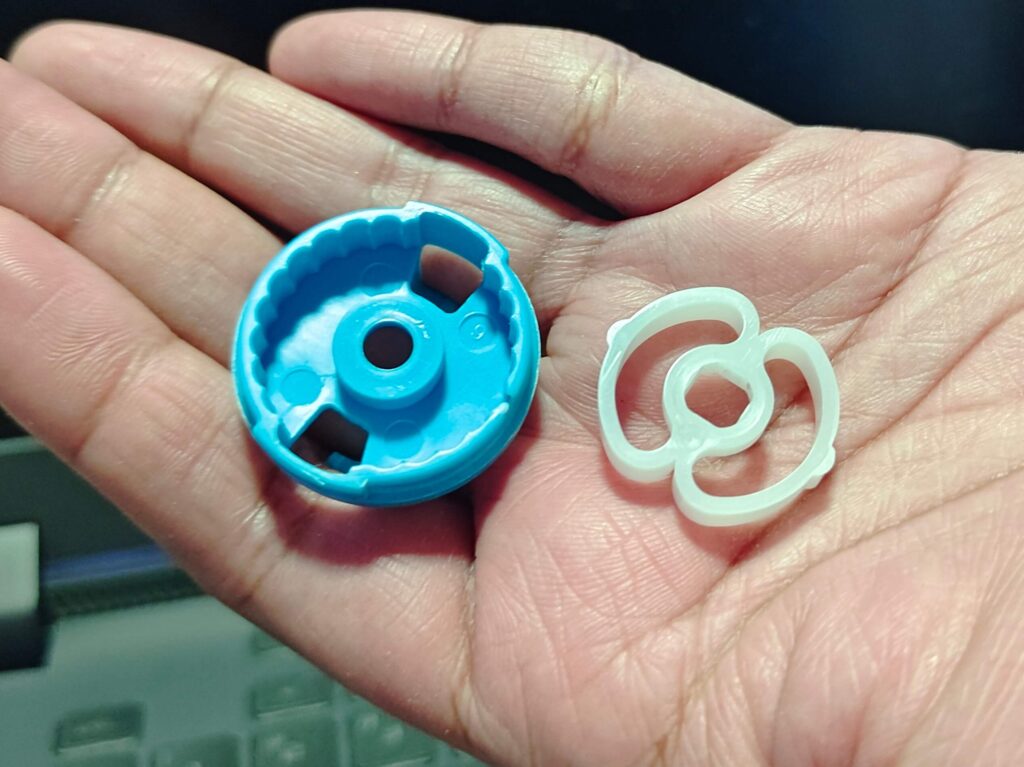
Skipping occurs when the Prongs, the part that holds/connects the beyblade to the launcher. Starts spinning independently from the Clutch, which is a white part that sits underneath prongs and connects it to gears inside launcher.

This is caused by daily wear and tear as well as things like twisting the beyblade after connecting it to the launcher. Parody video by Beylegacy is a great example of what I’m talking about. But how to fix it?
Things you will need
Don’t worry! It’s very easy to fix. All you need is 3 things
- Sticky Tape (can be any kind, just make sure it’s not too thick as we want to control it’s thickness)
- Screwdriver: 3.5mm Philips Head Type. It works with all kinds of launcher. But if you’re short on resources. Tip of scissors might be able to do the trick
- Scissors (even if you’re using duct tape)
Repairing Skipping In Beyblade Launcher
Step 1: Disassemble the prongs and take out the clutch


Step 2: Wrap the clutch with tape
3-5 layers should be sufficient. Make sure to not add too much tape.

Step 3: Cut the excess tape
This step is extra important. Make sure to make the side that’s touching the launcher as smooth as possible. Goal is to prevent tape from creating extra drag. Trust me when I say it makes a big difference. For the others side. You only need to make sure no large pieces are sticking out but doesn’t need to he perfectly smooth.

Step 4: Assembly
Make sure to place the clutch with indented side facing the prong. It should look something this.

Step 5
Have fun with your now repaired launcher! In case it wears down again repeat the steps above and replace with new tape. Launcher should last many more use before you need to replace it. If you liked this tutorial. Please share it with your friends and comment your thoughts below!

